Website “How-to”
(last updated summer 2012)
Welcome to JTFotography’s “How-to” page. Here you’ll find some walk through style tutorials to help you use, share, and order images from my website. (Please note, however, that Zenfolio is constantly making changes and updates which may result in a change or availability of the following.)
Select a topic;
How can I share my photos with others?
Can I purchase digital copies?
--------------------------------------------------------------------------------------------------------------------
“How do I access my photos?”
Accessing your photos is easy. All you’ll need is your personalized “access code” and “password,” which you should have received by email or via a “mini card” with this information on the reverse side. If you have not received this information please email me at [email protected] or by phone and I’ll be happy to assist.
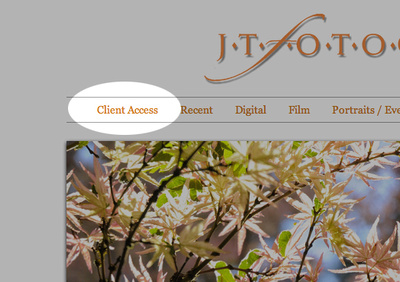
From my homepage (www.jtfotography.zenfolio.com) select the “Client Access,” option from the menu list.

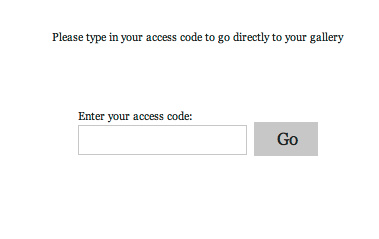
Next, you’ll be prompted to enter your “access code."
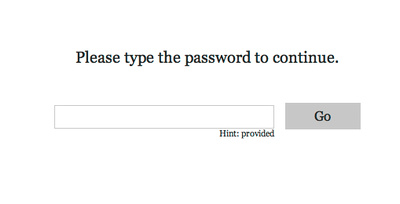
Next, you’ll be prompted to enter your “password.” (Passwords and access codes are not coincidental.)
Lastly, you will be taken to the secure folder that contains your photos. In some cases, this folder has sub-folders that include different sets or sessions for you and or your event. In addition, each sub-folder may have different access restrictions or image availability. Example, one set containing images that are free for download while another set contains images for purchase only.
“Proofing my photos”
“Proofing” and what is it? The concept of proofing is a process of review and selection of a client’s photos by the client which is then shared with the photographer. The photographer then uses this information to make final edits and changes to selected photos before final delivery. This process is efficient for both parties and yields quicker turnaround times. The process of proofing your photos can be fun but may require more time and consideration than single viewing might allow. Fortunately, this website has some tools to assist you in this process.
1st - You need to look through all your photos.
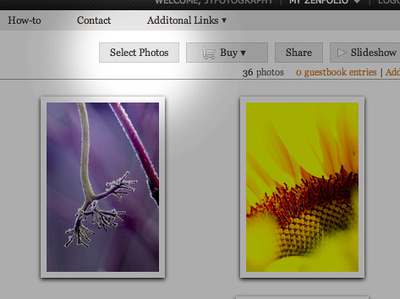
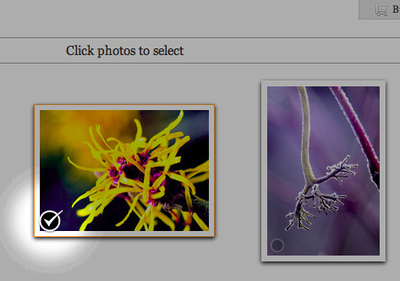
2nd - Begin selecting the photos you like. The easiest way to do this is to first click on the "Select Photos" tab (figure 1) which opens a "Click photos to select" drop-down menu (figure 2) and you can now check mark the images you like. Check marks can only be made to images in the “thumbnails” page. A closer look at each picture is available by clicking on it. Each image marked with a check mark will remain checked until deselected, even if you come back to your proofing at a later time.
(figure 1)
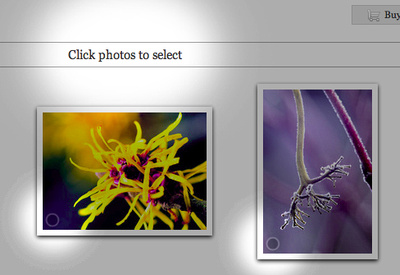
(figure 2)
 (figure 3)
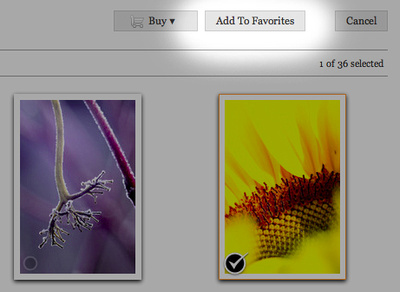
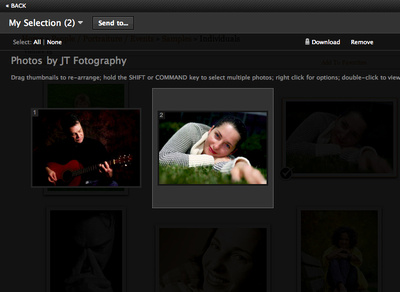
3rd – After check marking all the images you like or would like to consider for further editing you then add them to your “Favorites.”
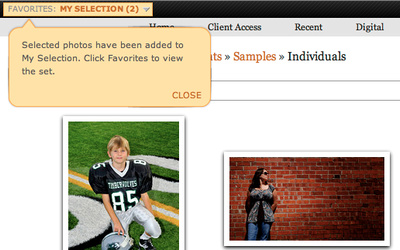
A drop-down menu will appear in the upper left corner of your screen indicating that your photos have been added to your favorites list. The total number of photos in the favorites list will be indicated in the parentheses. To view your favorites list, simply click on "My Selection." You can return to your photo page at anytime.
You may add images one at a time, in groups, or all at once. You may also stop and resume this process at anytime. Should you change your mind for some of your selections you may also remove images from your favorites list at anytime while viewing that page. (It’s important to note, however, the actions suggested here requires “cookies” to be saved to your computer. If these cookies are subsequently deleted, your favorites list maybe lost.)
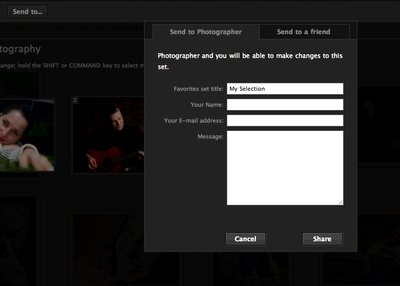
4th - Once you’ve selected your images you can then share that list with me (photographer) directly for editing. To do this, click the "Send to..." option in the upper left corner. A window will appear giving you the option to send to photographer or a friend, in this case, select the photographer. Fill in the necessary information including an special instructions or comments, then select "Share."
5th- Once your images have been edited they will be uploaded into a new subfolder.
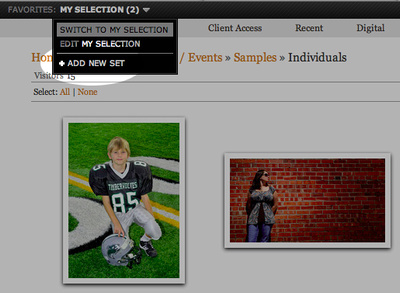
You can also create more than one favorites lists to consider for proofing or sharing. A separate list could include images that you would like to have in black and white, for example, or other such specific modifications. You could also create a separate list to share with certain friends or family when final editing has been completed. For example, in the case of a wedding, you could create a list that includes photos specific to the bride’s family while having a separate list specific to the groom’s. Each list can be named at the time you create them to help you stay organized.
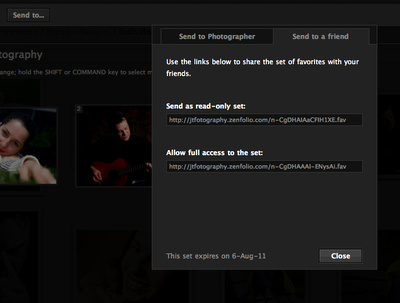
6th – When you’re ready to share with friends, use the “send to” function again while viewing a selected favorites list but this time chose the “send to a friend” option. Here you will see two lines of text. Each represents a direct html link to your favorites list, one allowing for read only (view only) while the other allows users to make changes. (Allowing others to make changes could be helpful in narrowing a selection choice.) With this consideration, copy and paste to your email, facebook, twitter, etc. to share. Important note! If your images are password protected you must also provide your recipients with that information, otherwise, they will be prohibited from viewing. It's also important to note that "favorites" galleries expire 30 days after they've been made.
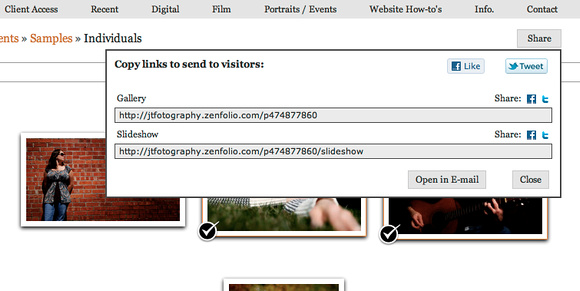
"How can I share my photos with others?"
My website provides several ways to share photos with your friends and family. In addition to the method described in the “Proofing” section a quicker and more simplified method is also available but with less control. After entering your photo gallery (or any other gallery on my site allowing access) you can quickly share it in its entirety by simply clicking on the “Share” button located in the upper right hand corner. After doing so, a window appears providing you with the following options; direct links to the gallery view or a slideshow view that can be copied and pasted to your email, facebook, etc.; or via the “email” button; or by simply clicking on the facebook or twitter icons. Recipients will then be able to view all the photos in that gallery. Important note! If your images are password protected you must also provide your recipients with that information, otherwise, they will be prohibited from viewing.
If you prefere to share only a select set of photos with others then please review "Proofing my photos." There you can learn more about building favorites list and how to share them.
"How can I order prints?"
First, you need to pick the image(s) you would like to buy. There are several ways to start but to simplify, select the image you whish to purchase with a check mark. You can then click on the "Buy" button in the upper right corner or from the top center of your screen. If you'd like to take a closer look at an image first, single click on it and you’ll be taken to a new page providing a larger view of your selected image. From here, the "Buy" option is also available.

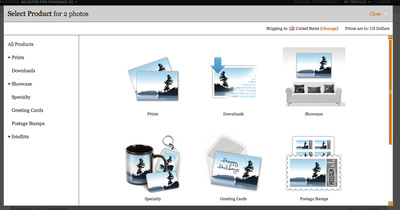
Clicking on the “Buy” button then presents you with more options. Clicking on the "Select product" option in the drop down menu begins checkout process. It starts with a product selection, i.e. Prints, Downloads, Specialty, etc.. You can make your selection via the icons or via the list to the left.
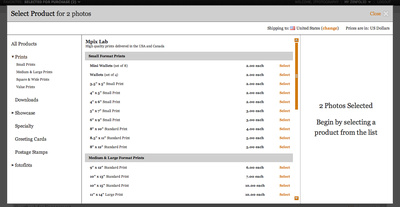
Once you’ve selected a product type (in this case a print) your print sizing options will fill the center window along with pricing and availability information. Product information will also appear to the right once you’ve made a selection. This information is provided by the printing lab about their product(s).
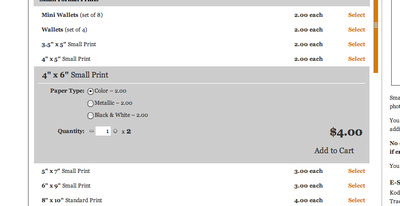
Next, choose the quantity and view the updated subtotals (This sample image has a quantity of 1 with two images). Add to cart when finished and continue.
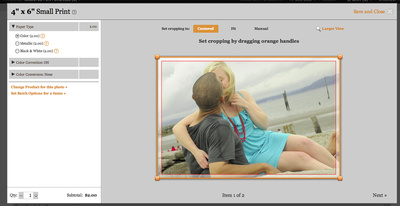
Next, you'll see an overview of you selection(s) and subtotals. Here, additional options allowing you to "Preview and Configure," "View Shopping Cart," "Buy more products with selected photos," "Continue shopping," or just to "Checkout Now," are available. "Preview and confingure" is where you can make manual cropping adjustments if needed (ie. cropping for an 8x10), color, paper type, and quantity changes. The rest should be self explanatory.
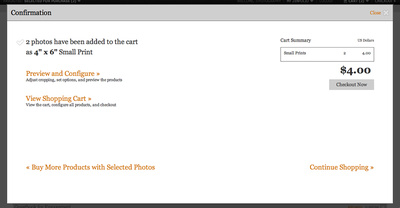
(The "Preview and Configure" window)
Once you've made your selection and changes, click on "Checkout Now" and continue.A final overview of your selected image(s), product choices with option adjustments, and a new subtotal will be displayed. At this point, however, you can still make changes or correct mistakes before finalizing your order. After you've carefully reviewed your entire order continue to the final portion of the checkout process. (During this portion of the checkout process you'll also be able to take advantage of applicable coupons.)
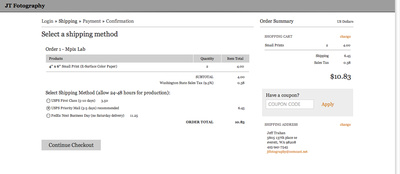
At the end of the checkout, you'll be offered a printable receipt for your records. In addition, I will also receive an order confirmation with detailed information that includes product types, sizes, corrections, etc. for my records. Payment information is not included, of course, for your security. This information can be helpful, however, should you have trouble with your order or questions.
"Can I order digital copies?"
Yes. I offer digital copies that can be used as wallpaper for your computer, facebook, etc., full resolution copies for large prints and commercial use (except for personal images). All digital copies come with license use terms that must be honored. I offer this option because I realize that not everyone may wish to use the printing labs that I've chosen. A digital copy gives you the choice and flexiblilty to have your image(s) printed through any lab or print option, ie. a personal printer.
The purchase process is essentially the same but with a few exceptions. After making your image selection(s), proceed via the "Buy" option and choose the "select product." This time, however, from the options menu to the left, select "Downloads." Your digital options will display in the center window with their respective unit pricing. Again, from here the process is the same and selected digital products will be added to your shopping cart. With digital products you'll be asked to review the licensing agreement(s) before purchasing. At the very end of your checkout, after you've completed and paid for your products, you'll be able to download any purchased digital content. It's important that you do not forget to do so. The download option is active for 30 days from date of purchase, after which it expires. Downloading does not begin automatically!